统一代码格式化详解
统一代码格式化详解
项目的代码通常是一个团队共同完成的,要保障代码质量的首要前提就是统一代码的风格,本文将介绍常用的统一风格的措施之统一代码格式化。
统一代码格式化
统一风格的第一条,就是要统一代码的格式化,因为不同人提交的代码格式化不一样将导致merge代码造成大几率的冲突;而统一的代码风格无论是对于项目可维护性,还是降低merge冲突都是极为重要的。
通常是两种方式:一种方式是,强制使用同样的IDE工具;另外一个更为常见的是,使用同一种代码格式规范。
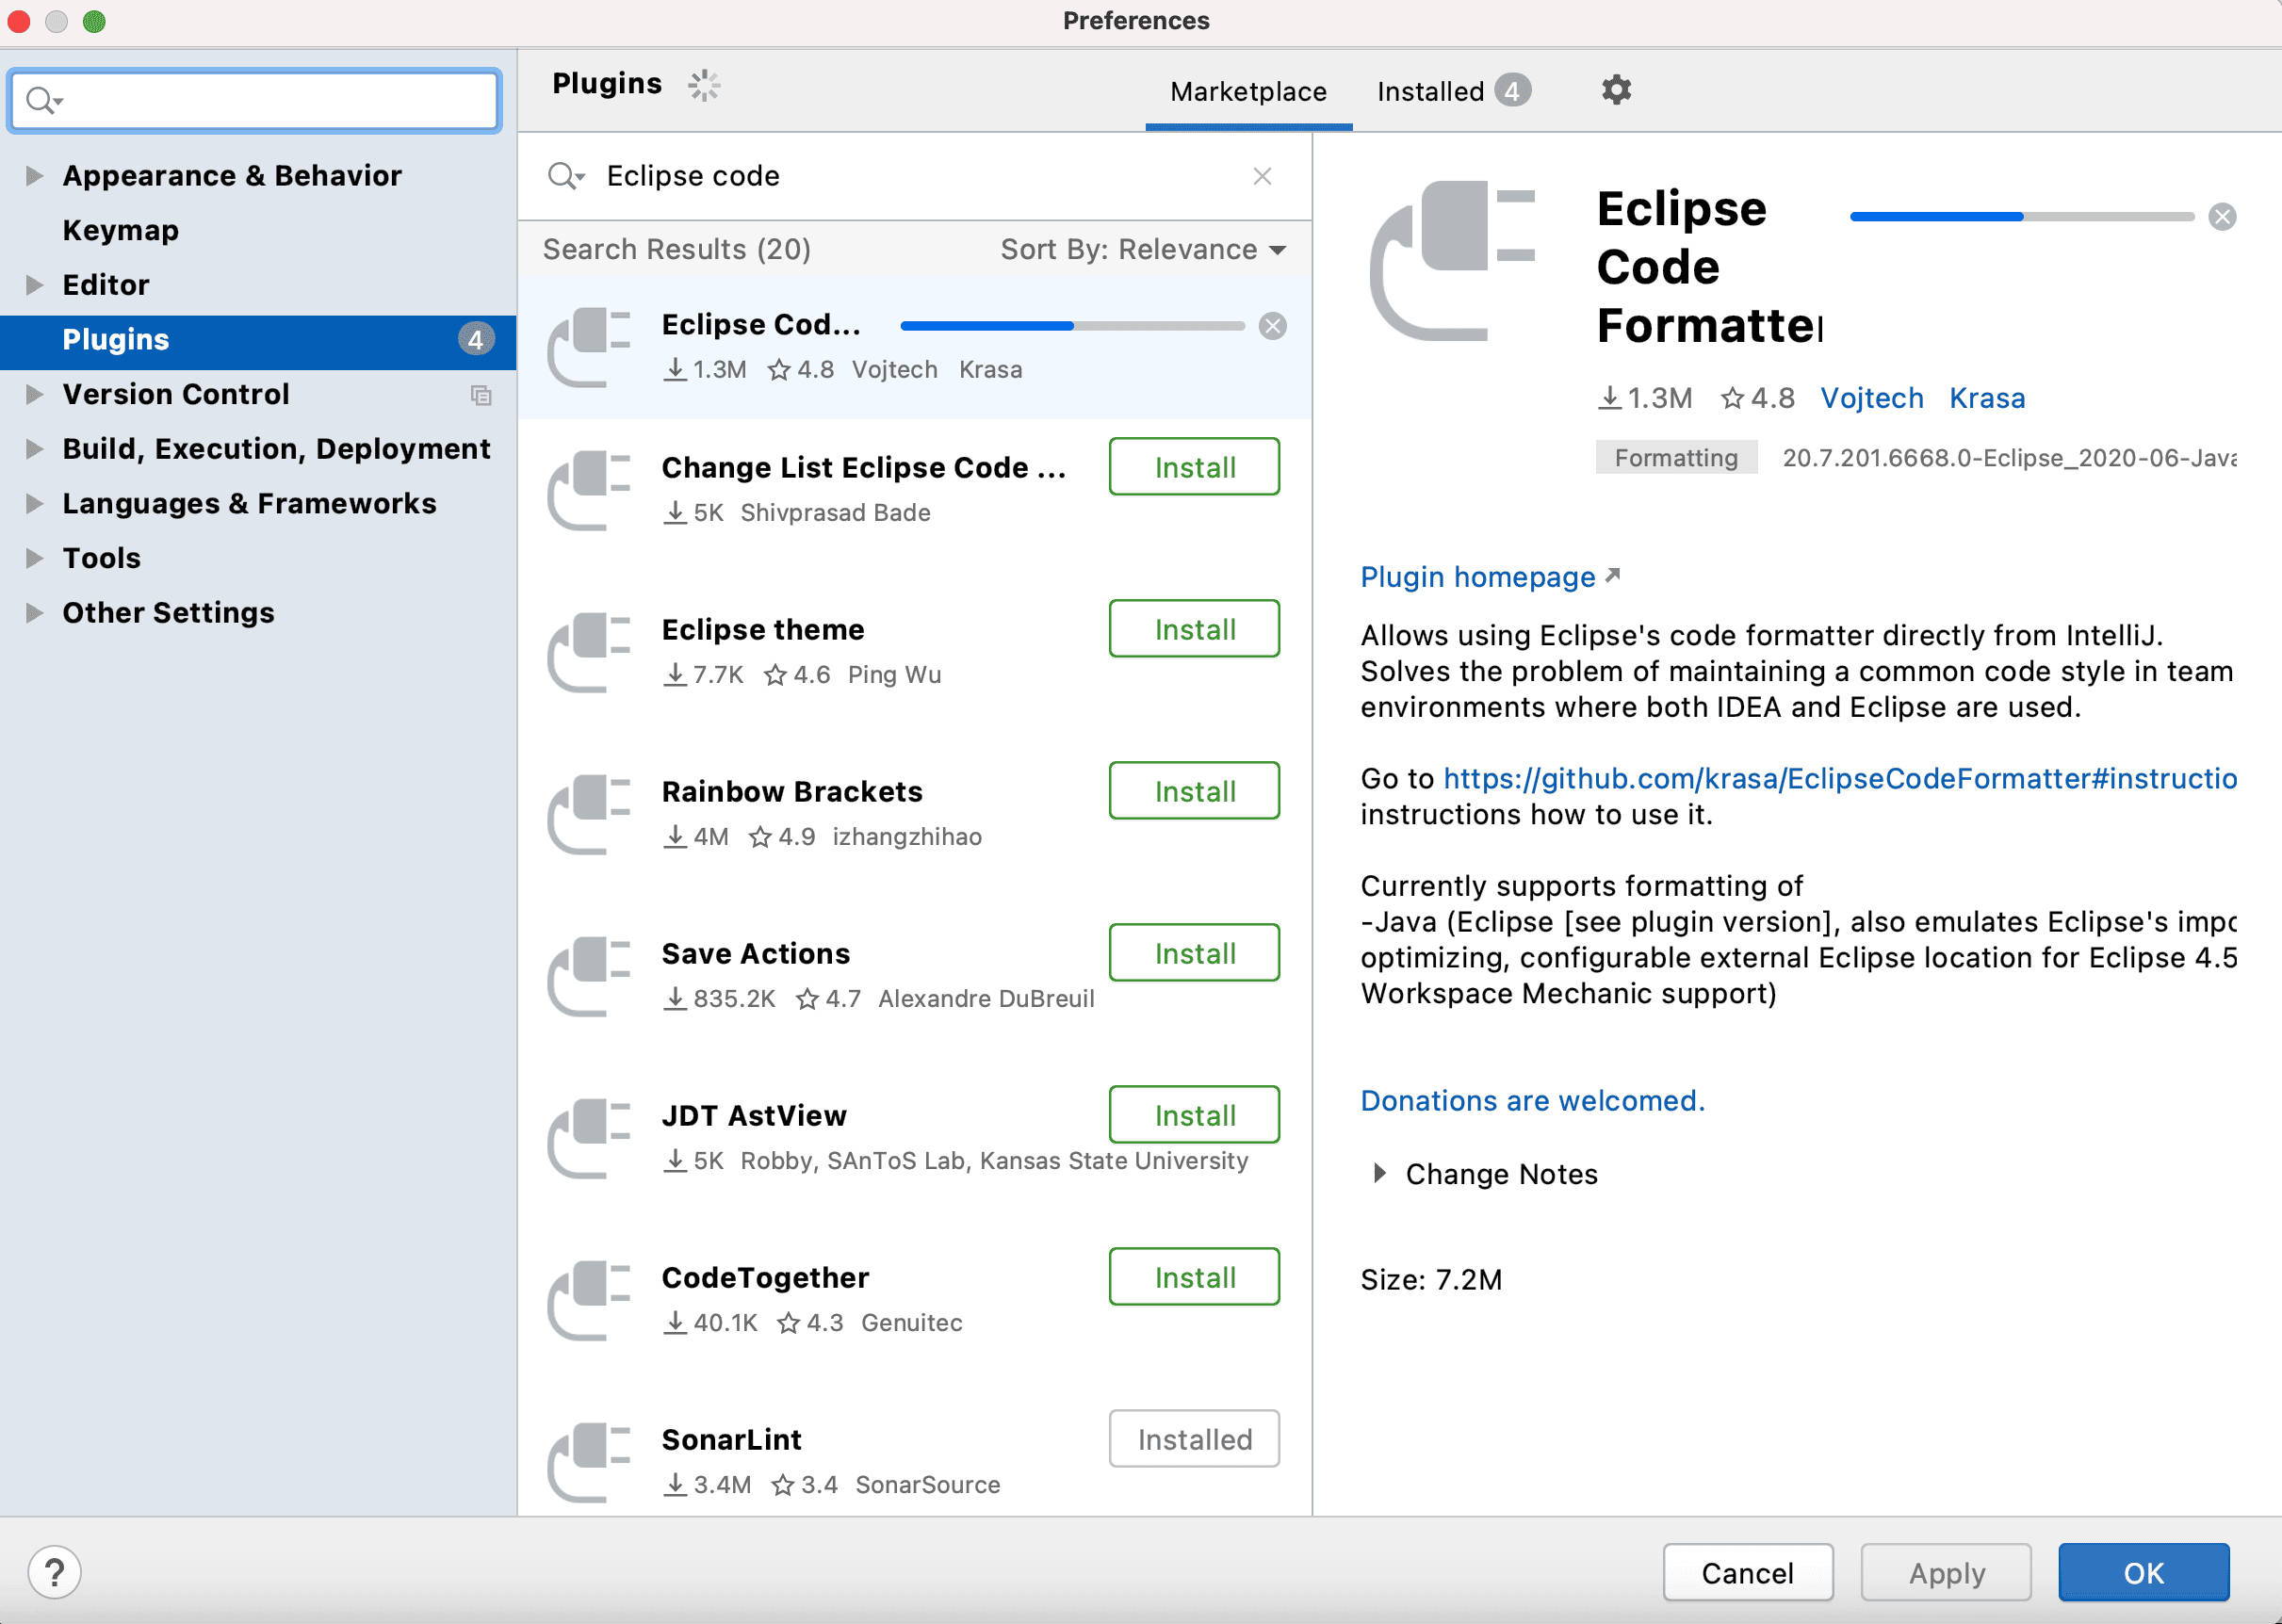
Eclipse code formatter插件
最为常用的工具是 Eclipse code formatter插件, 用来统一eclipse和IDEA等IDE的代码规范
- 安装Eclipse Code Formatter插件:
(安装完之后需要重启idea)
- 启用Eclipse Code Formatter
File->Settings->Other Tools->Eclipse Code Formatter->Use the Eclipse Code Formatter
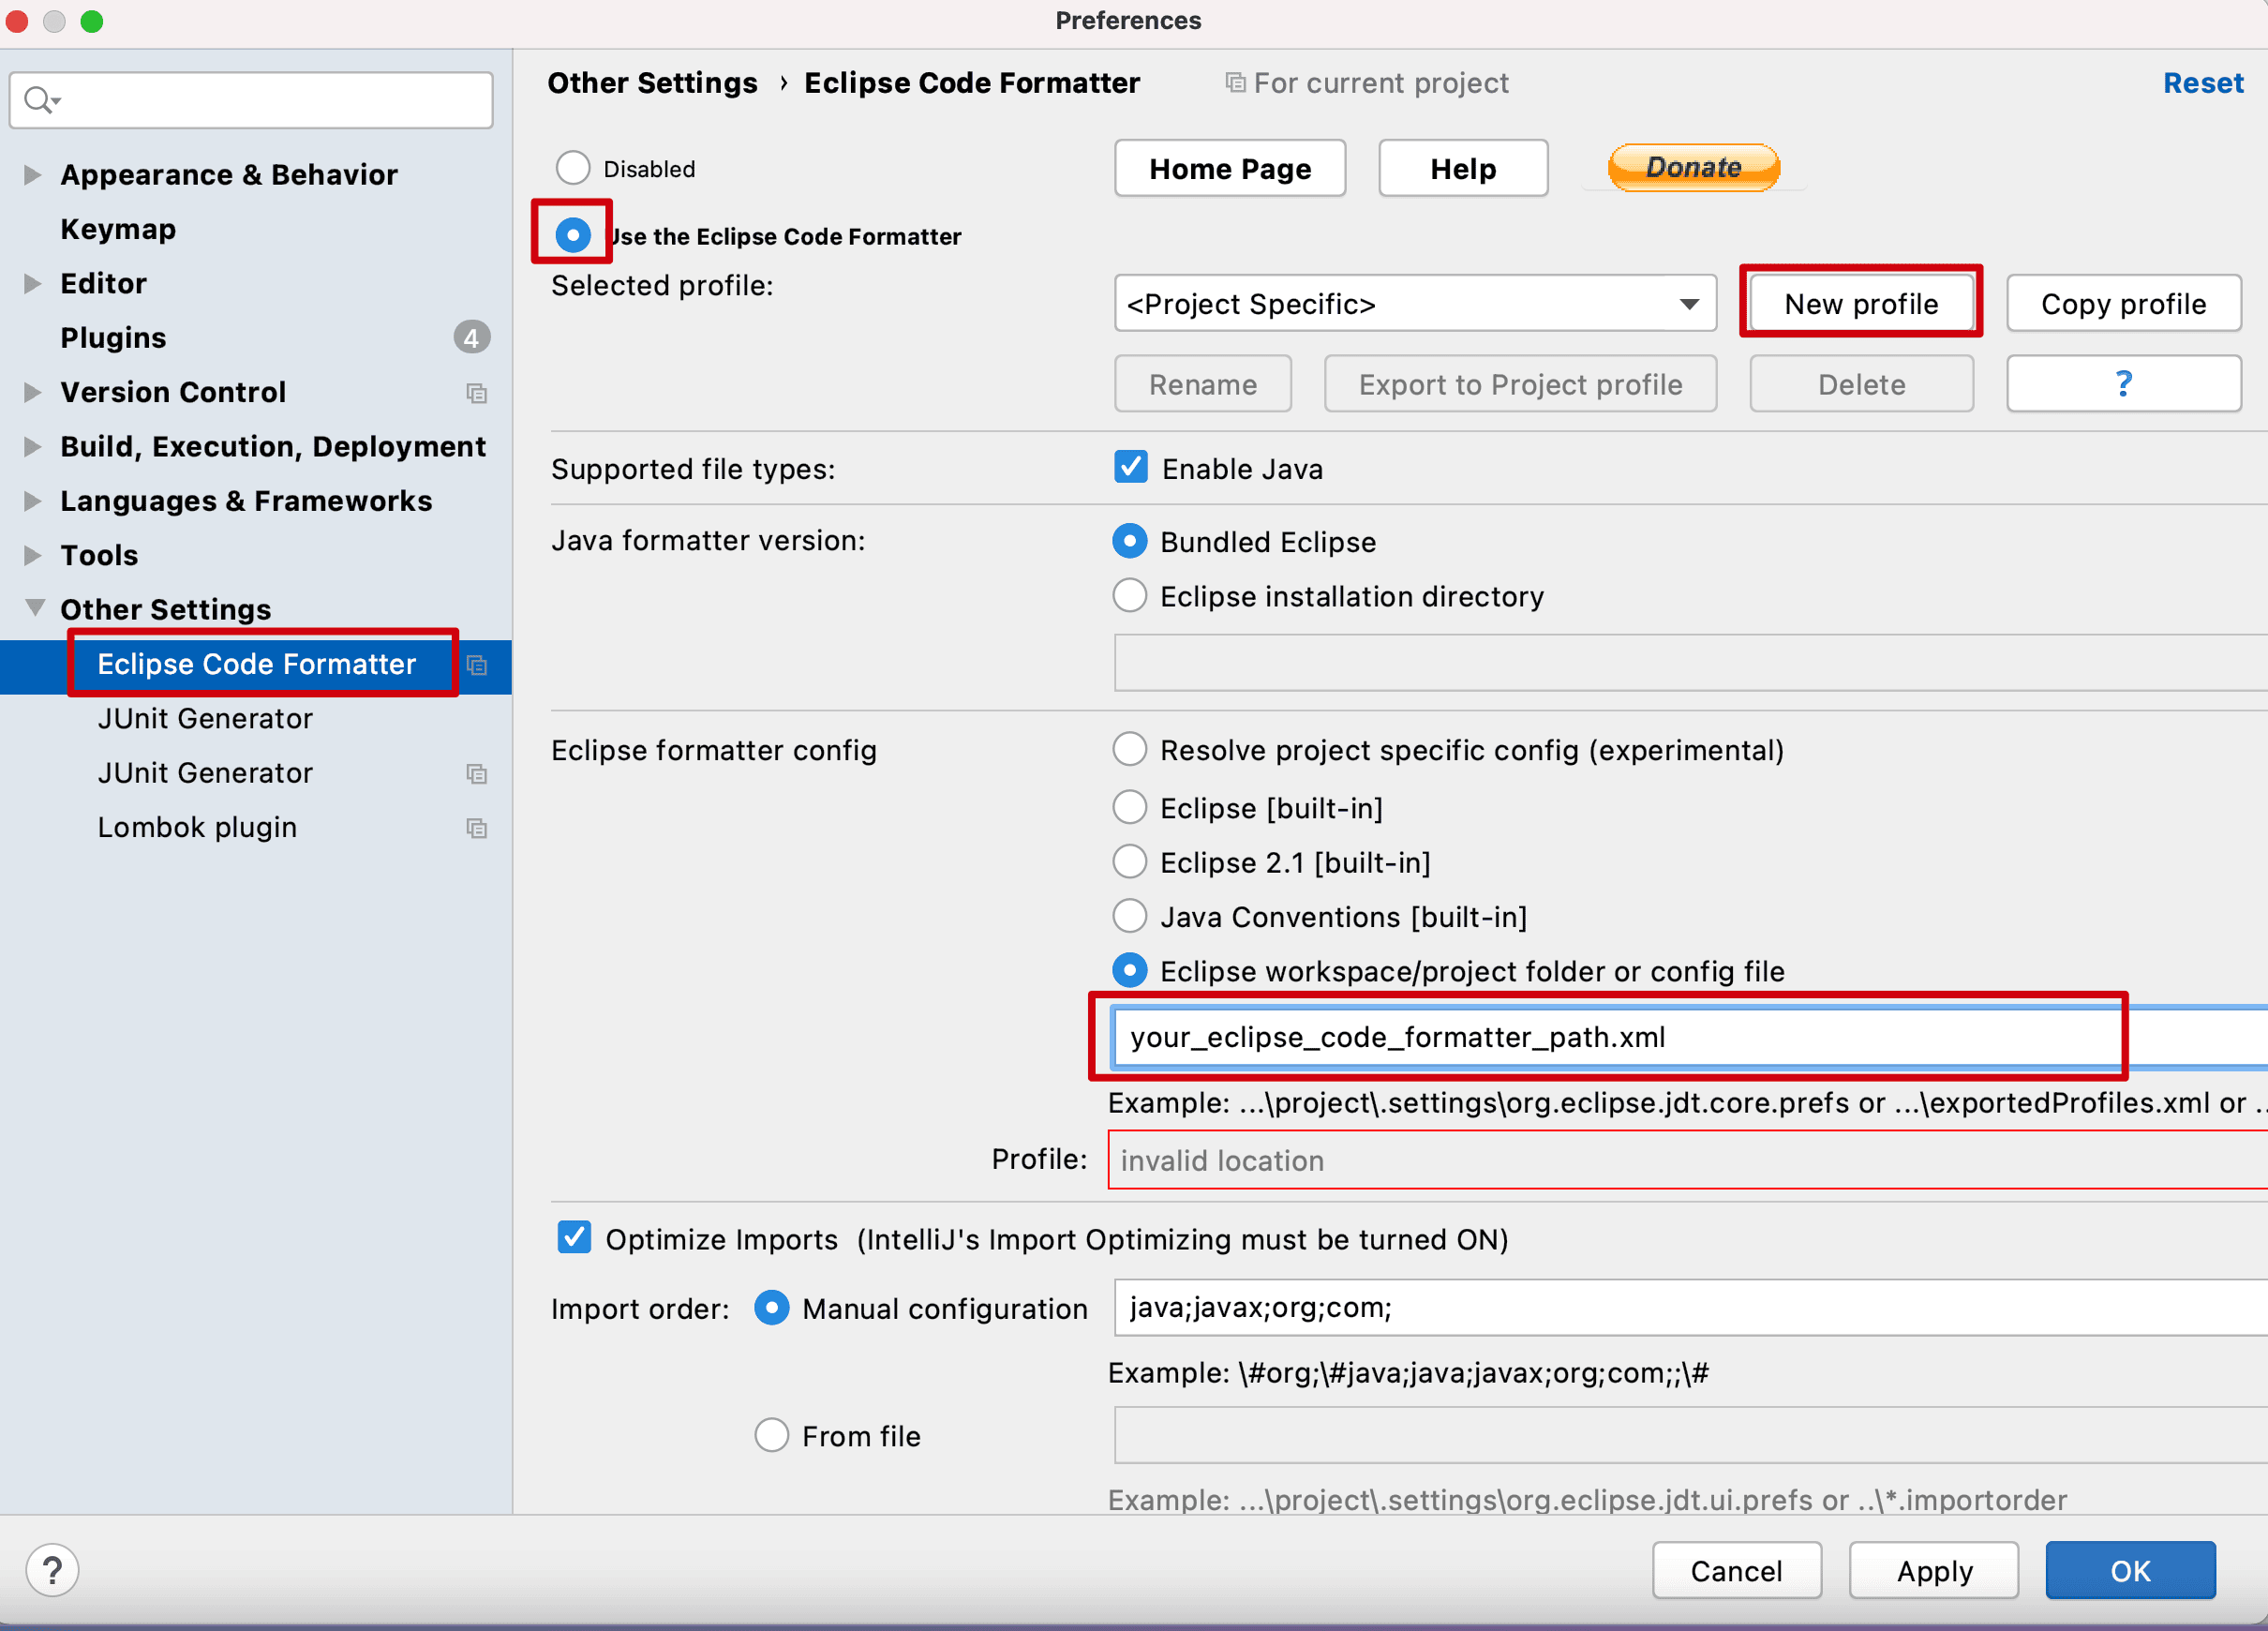
(相关的formtter.xml配置文件可以到网上下载下或者用eclipse导出下)
其它IDEA统一样式
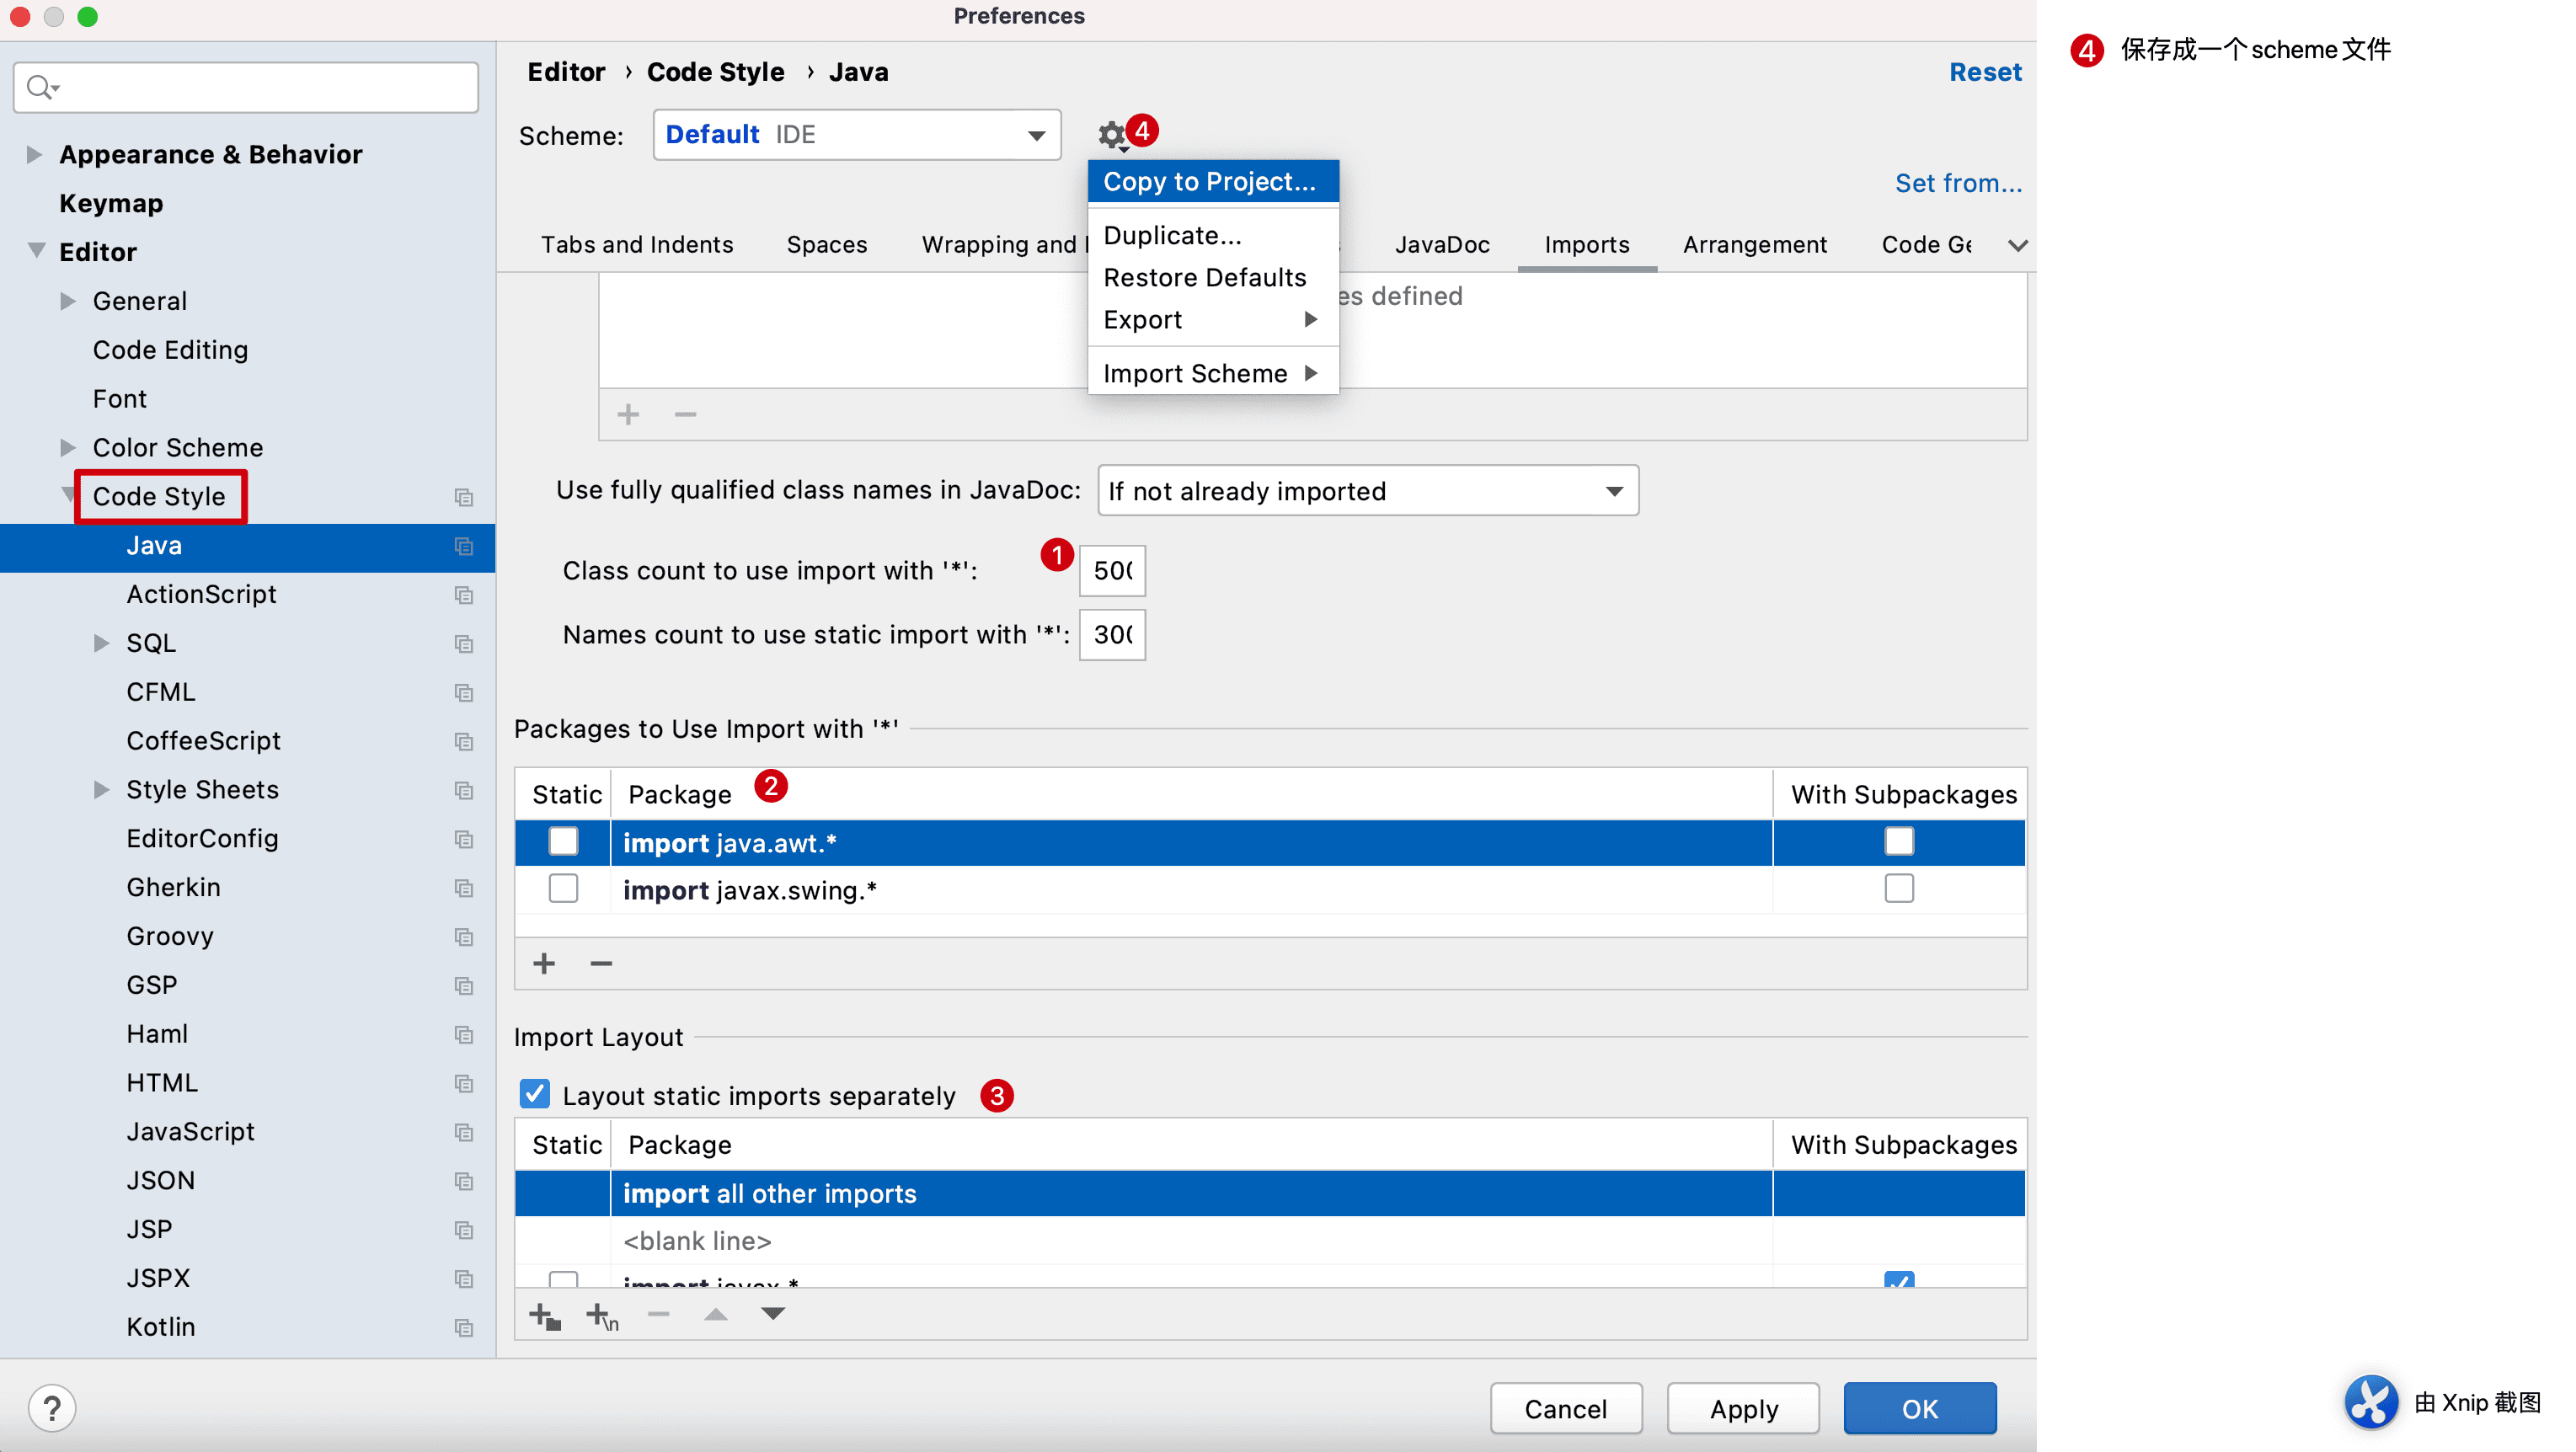
在Eclipse Code Formatter配置后,还是会有其它一些差异的,这时候还需要通过IDEA约定一些设置和一些公共样式的scheme(这里也会同时考虑checkstyle等样式检查工具对代码的要求)
- 配置自动导入包

- 配置code style
通常而言,注意下这里几步(当然你可以设置更多,特意截图这几步,主要考虑checkstyle的要求及imports化在不同IDE下的差异),然后保存我一个scheme放到项目根目录下,供所有队员统一使用
统一的注释
- 类文件头的注释
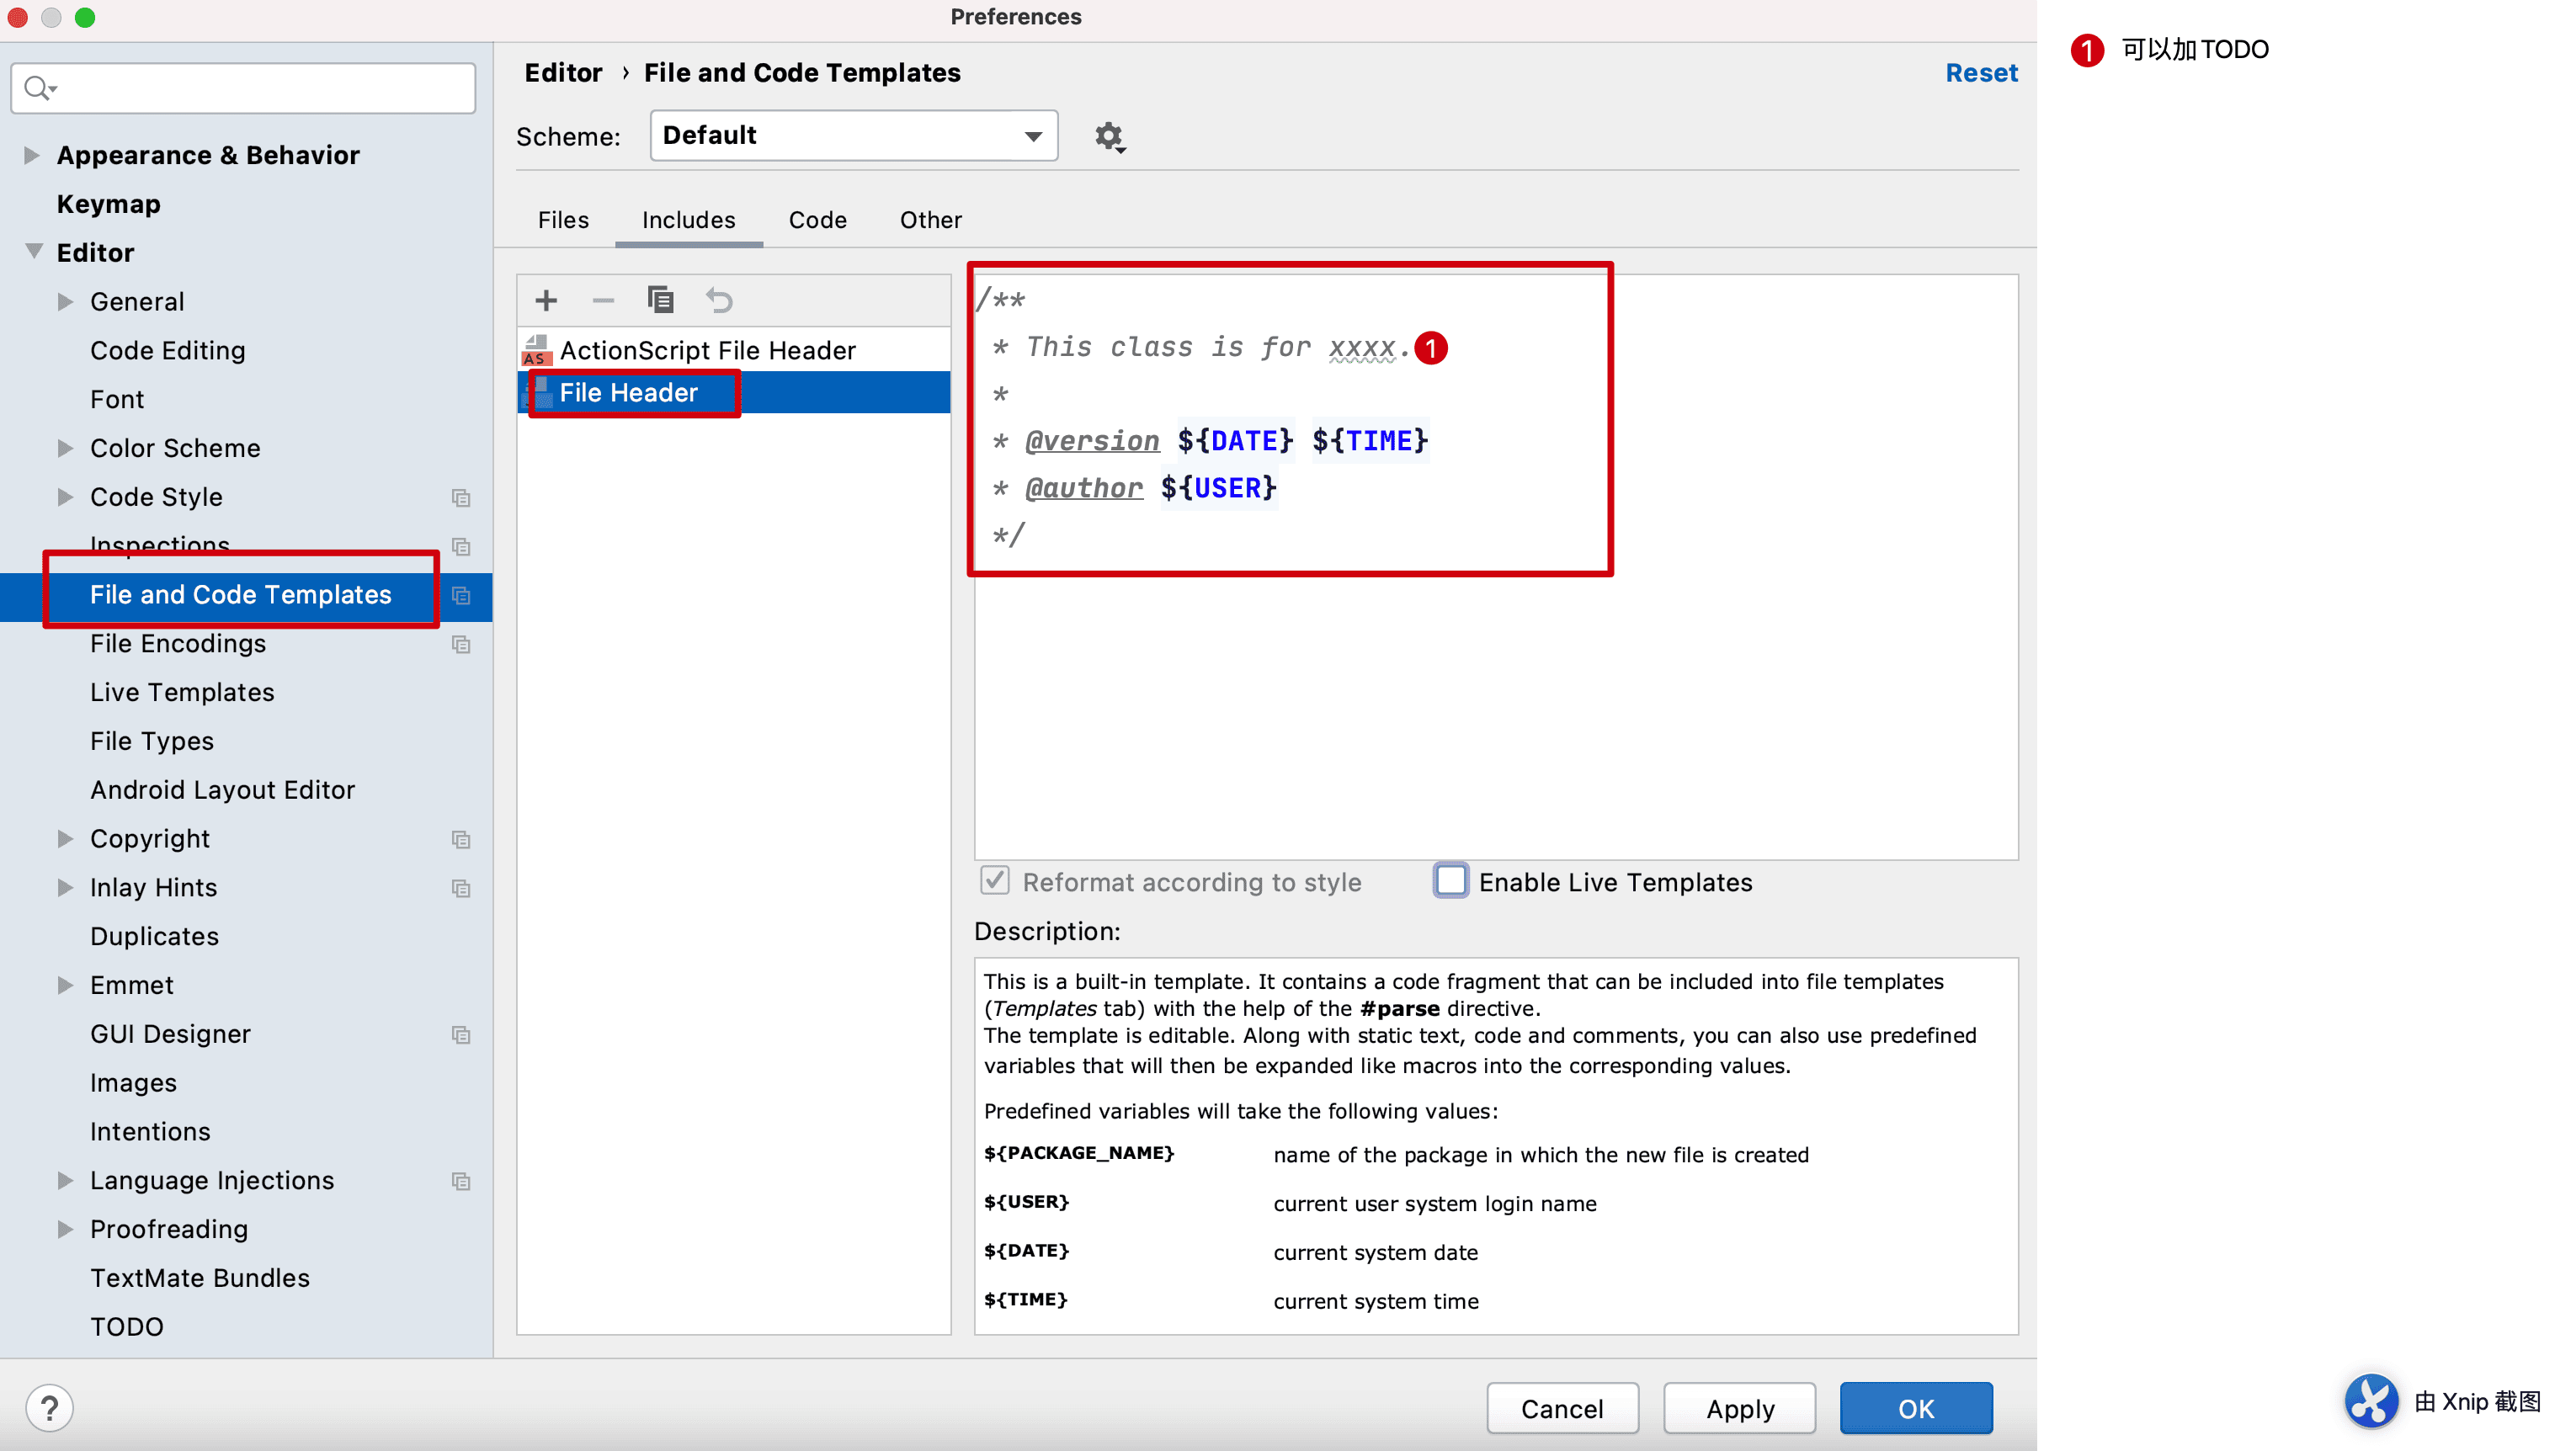
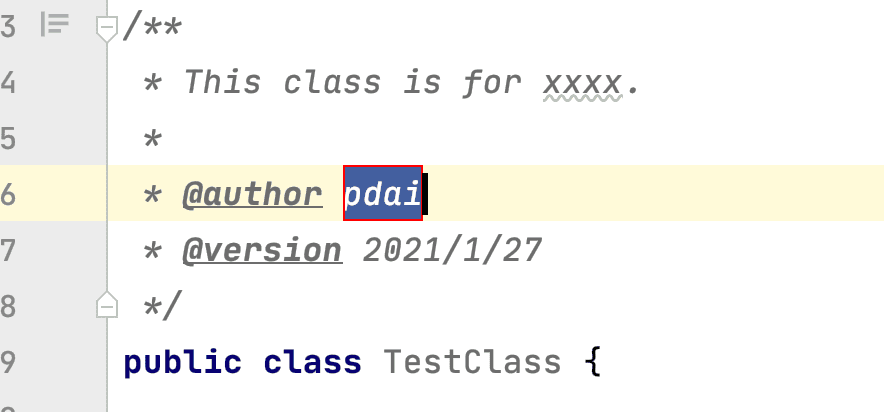
测试下, 创建一个类TestClass,将自动生成文件头注释
/**
 * This class is for xxxx.
 *
 * @author
 * @version 2021/1/20
 */
public class TestClass {
}
当然,如果你发现对已经存在的类进行类注释'/**'时无法自动加入上述注释时,还可以使用Live Template
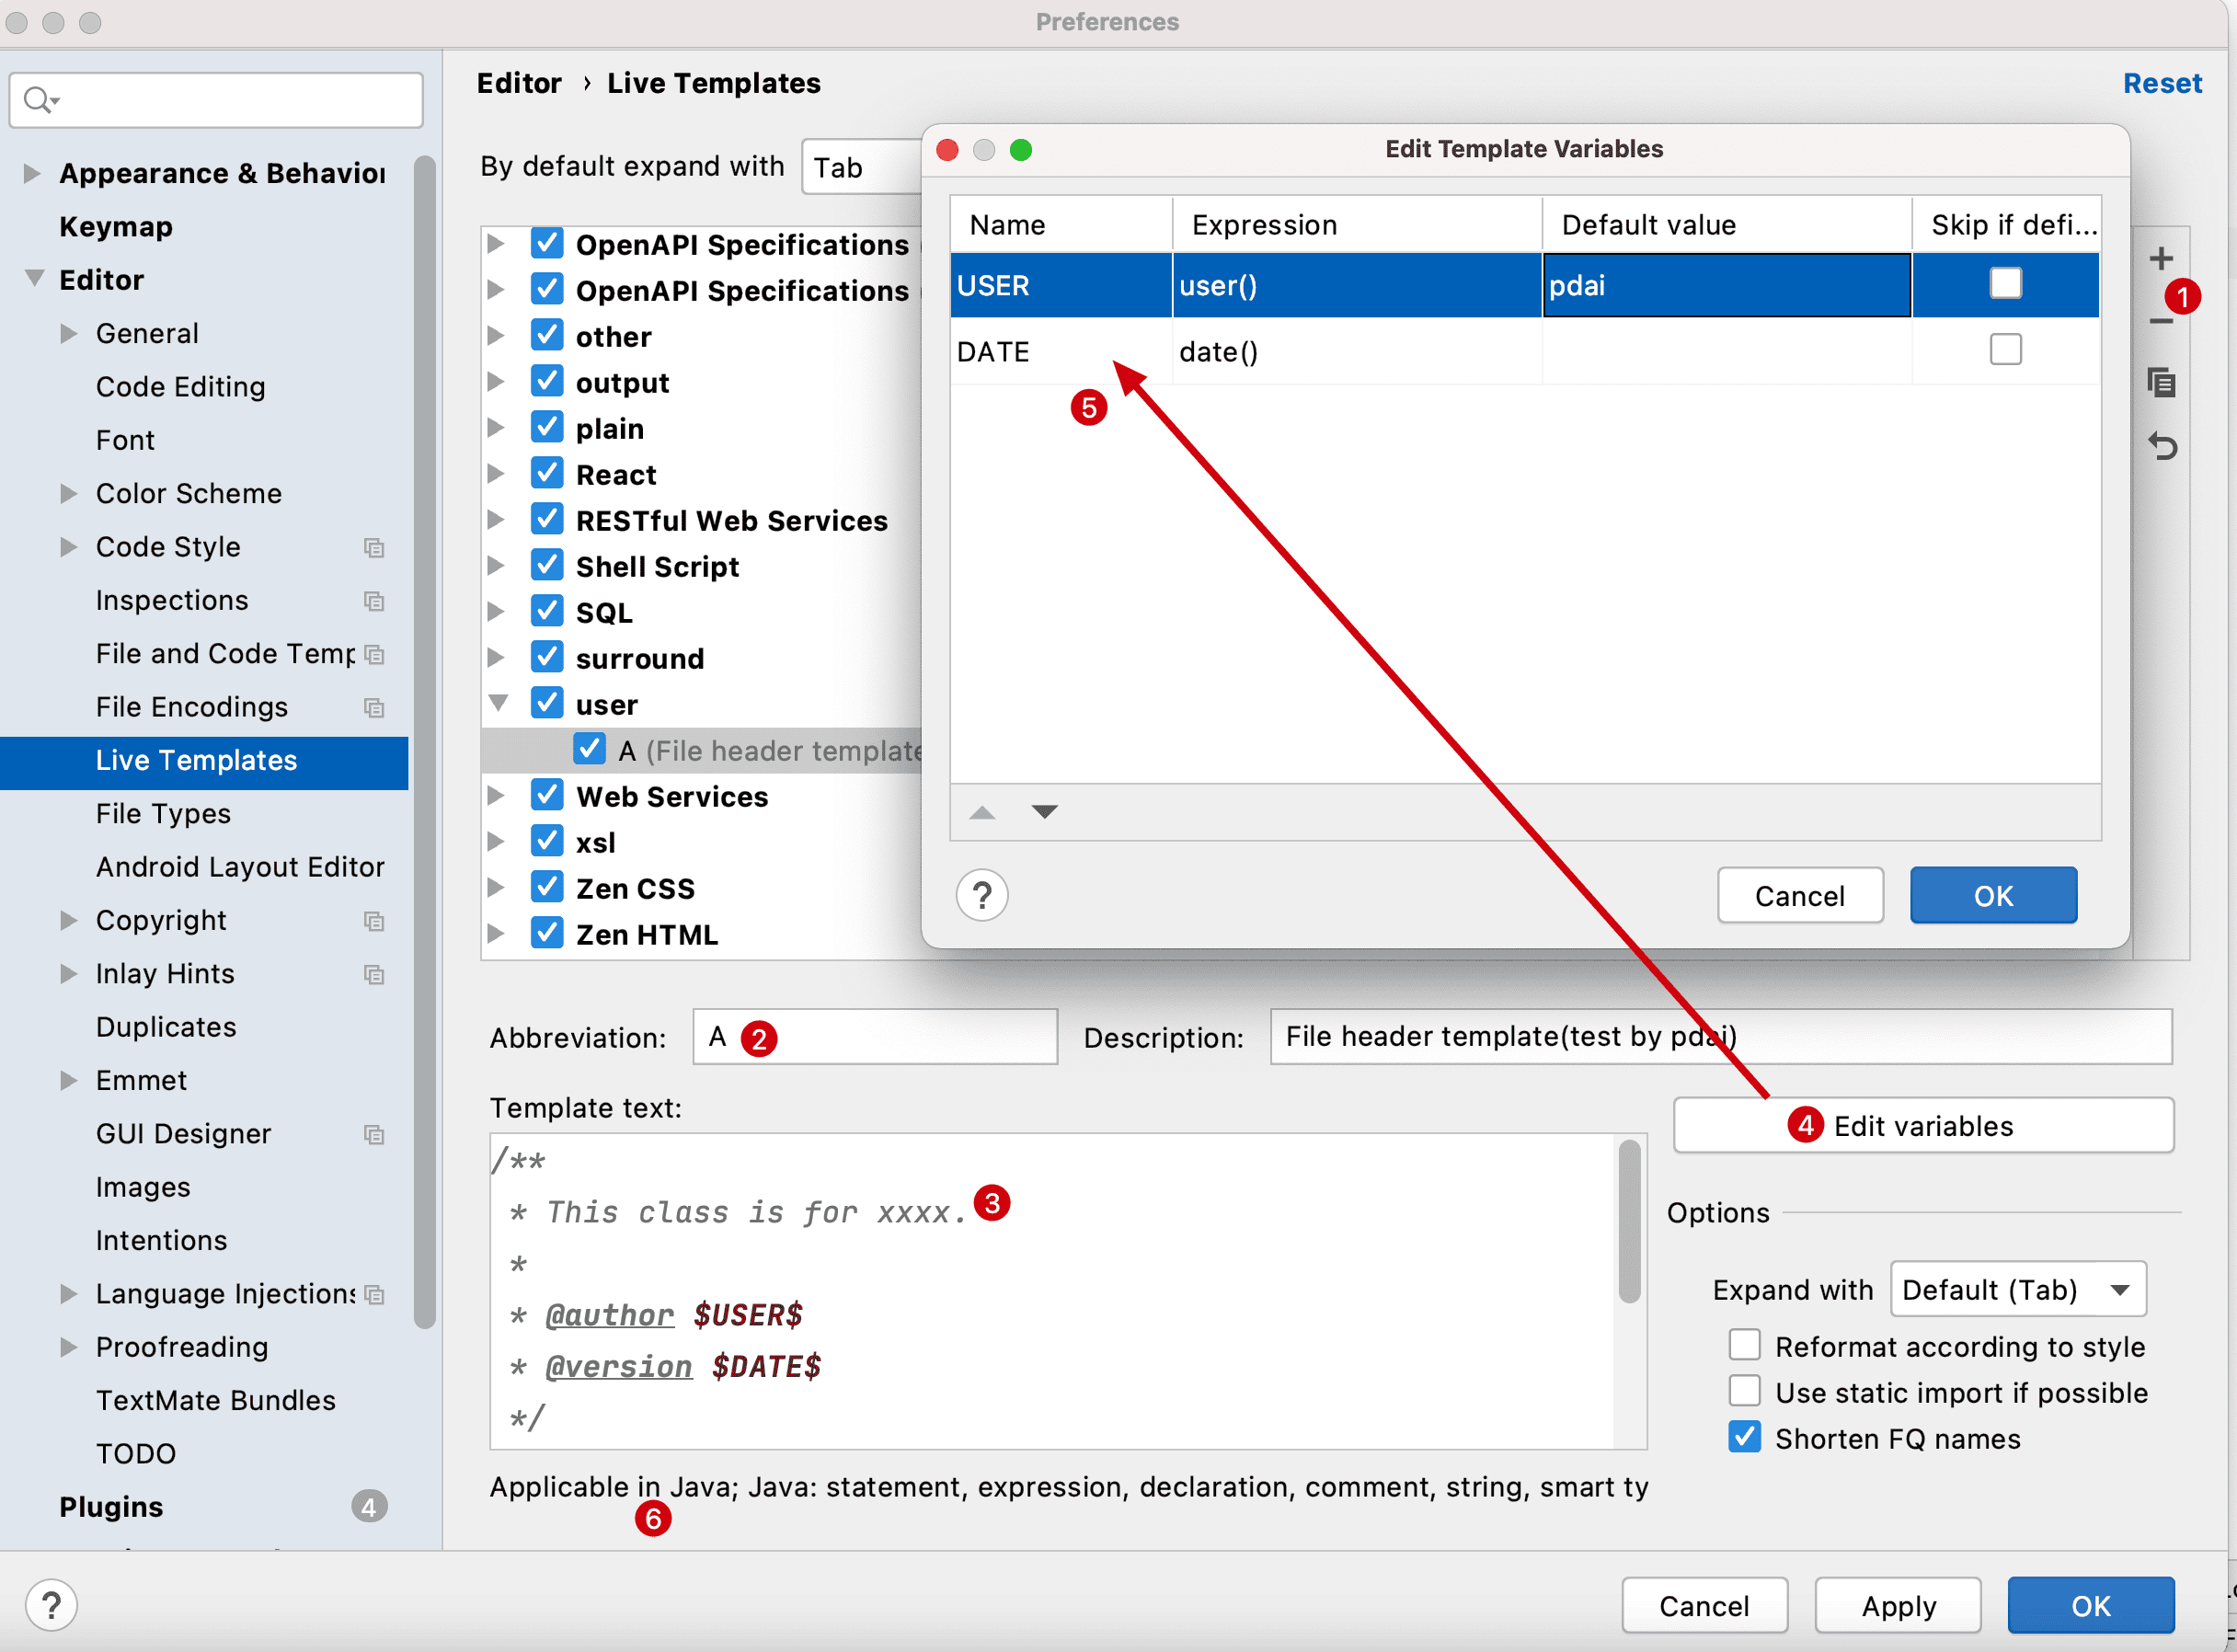
配置好以后,方法头 输入A,然后按TAB键

再按Enter
- 方法的注释
如果有必要的话,还可以设置下方法的注释(其实我觉得默认就够了)
(参考上述Live Template方式)